
Pipelines let you set up workflows for different event types so your team can follow clear, structured processes.
In the Object Manager, you can create new pipelines, edit existing ones, and keep everything organised.
Accessing pipelines
-
Click on the Object Manager in the left navigation bar.

-
Click Pipelines under Events to open the pipelines page.
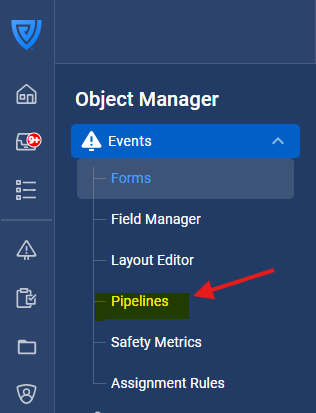
You’ll see a list of all pipelines in your organisation, including their name, last modified date, and which one is the 'Default' pipeline.
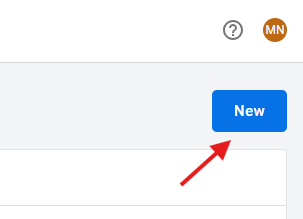
Creating a new pipeline
-
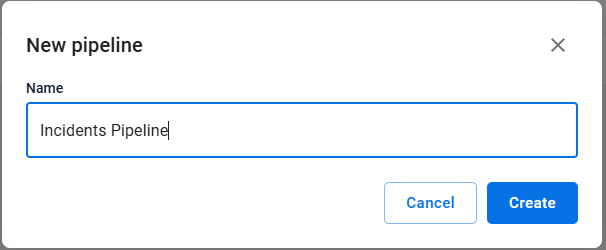
From the pipelines page, click New in the top right of the screen.
-
Enter a name for the pipeline that matches one of the types of Events you want to create a workflow for (e.g. “Incident Pipeline” or “Complaints”).
-
Click Create.
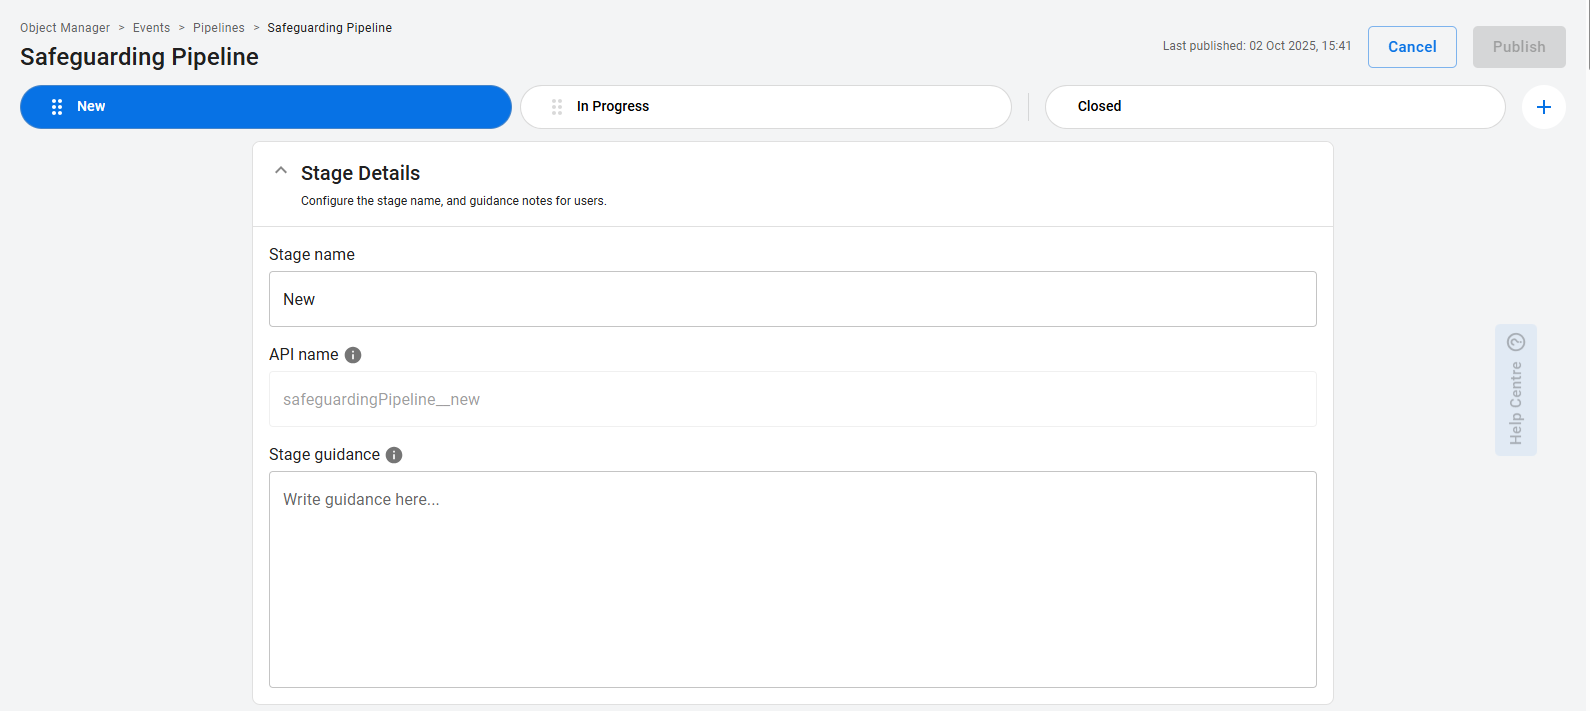
When you create a new pipeline, the system automatically generates three default stages:
-
New (Open)
-
In progress (Open)
-
Closed (Closed)
See below for how to edit your pipeline, including how to rename and reorder stages
Editing a pipeline
In this section, learn how to:
-
Add, rename, and reorder stages.
-
Set guidance for each stage.
-
Choose which fields to display for each stage.
-
Remove stages.
You can create up to 7 stages per pipeline.
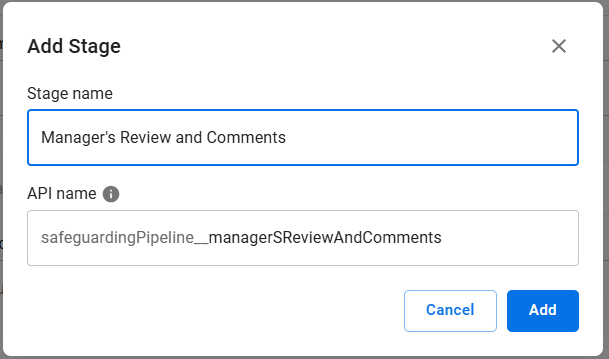
To add a new stage, click the + button in the top right.
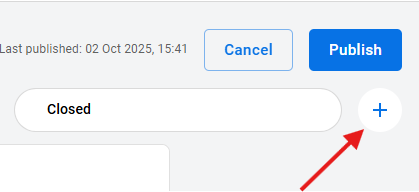
Then name your stage and click Add or press enter on your keyboard.
How to reorder stages
To change the order of stages, hover over the six dots beside the stage you wish to move, then drag it to your desired position.
Click Publish in the top right corner to save the changes.
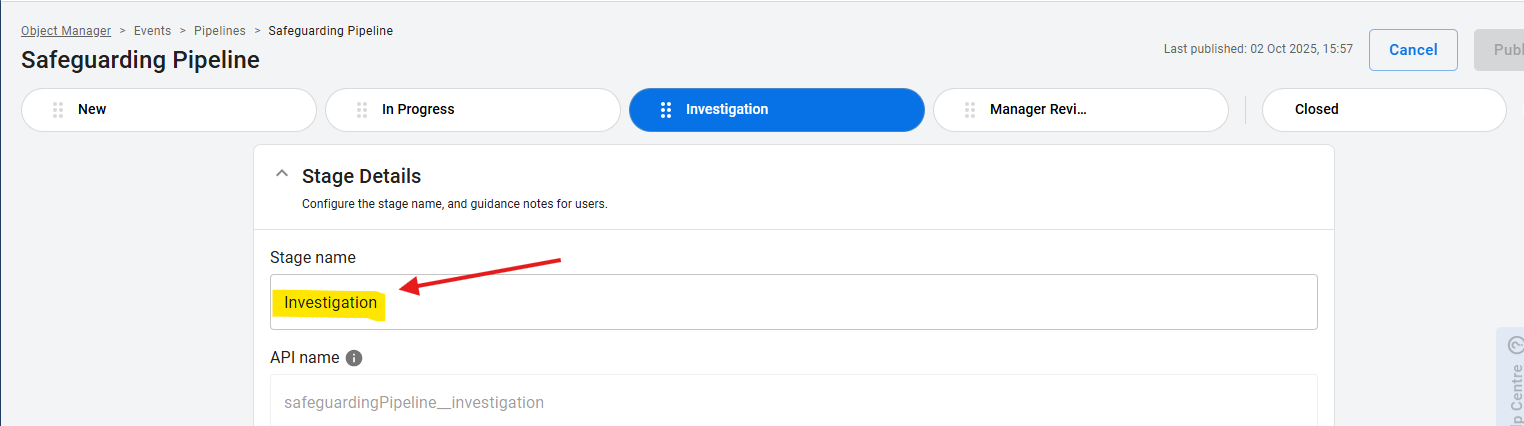
To rename a stage, click on the stage at the top that you wish to rename, and enter the new name under Stage name.
How to select which fields to display for each stage
To choose which fields appear at each stage, click on the stage at the top and scroll down to select the fields you want displayed.
This helps structure the investigation and follow-up process, guiding managers on what to do at each step and reducing the need to scroll through unnecessary fields.
We strongly suggest including guidance for each stage of your pipeline to assist managers in understanding what they need to do or provide during that phase of the event follow-up or investigation process.
To do this, select the stage you wish to leave guidance for and type the guidance in the text box.
Then click Publish in the top right to save.

Managing pipelines
On the pipelines page, use the three dots menu (•••) beside each pipeline to:
-
Edit – open and configure the pipeline.
-
Delete – remove the pipeline (only if there’s more than one).
-
Mark as default – set this pipeline as the fallback when no assignment rules apply.
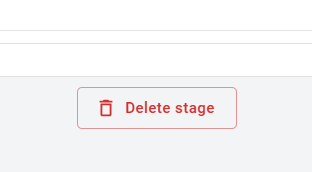
Select the stage you want to remove and scroll right to the bottom of the page.
There, you will find the option to delete the stage.
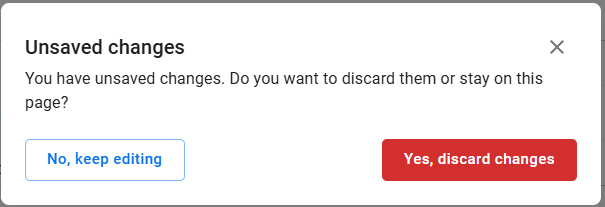
Publishing changes
Changes are saved only when you click Publish. If you try to leave the page without publishing, you’ll see a confirmation message so you don’t lose your work.
Tip: Start with a single pipeline and add more over time as your processes become clearer.