
The Events module replaces Incidents. If you are still using Incidents, refer to the Incidents section.
The form builder is where you create your reporting forms. Here, you add your questions, group them into sections to make the form easy to navigate, add logic so that certain questions only appear when specific responses are selected, and determine the audience (who will see the form) and notification settings.
Please take a look at the step-by-step guide below or the video tutorial, whichever format works best for you.
-
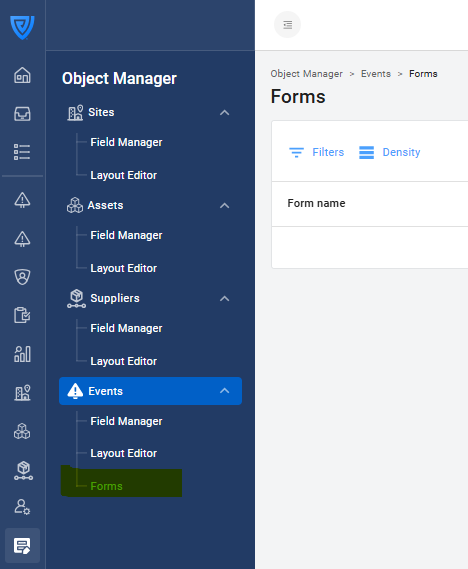
Go to Object Manager > Events > Forms.
-
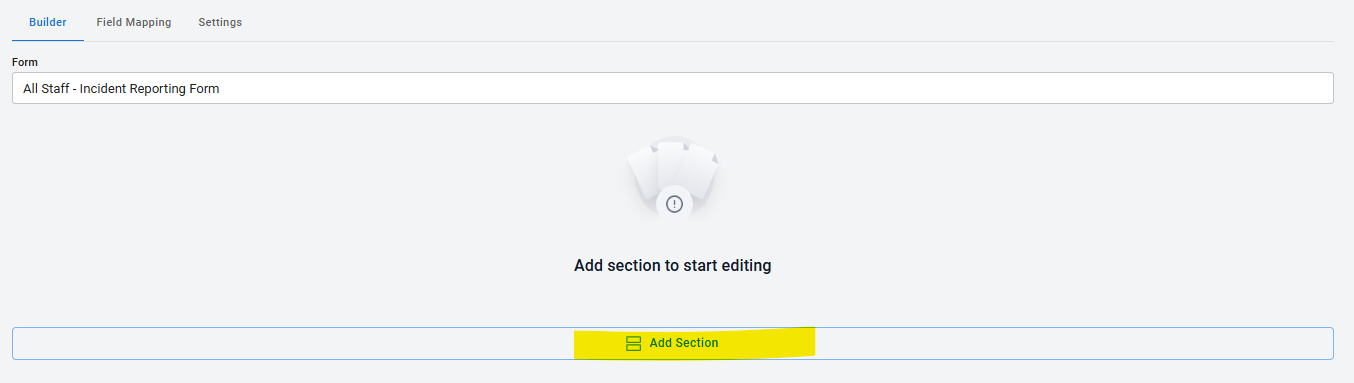
Click New Form or click on one in the list to edit an existing one.

-
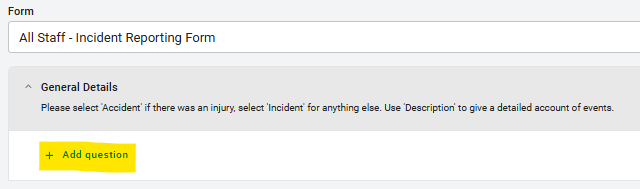
Name your form based on what it will be used for and, if applicable, the intended audience. For example, 'Incident Reporting Form', 'Patient Feedback Form', or 'Complaints and Compliments Form'.

You can create multiple forms for different use cases and audiences.
2. Add sections and questions
Guidance for building a successful form
-
Keep questions brief and clear. Make it easy for reporters to know what information to provide.
-
Consider your audience. Avoid acronyms and jargon reporters may not be familiar with.
-
Use dropdowns instead of free-text fields where possible. It is easier to generate reports and analyse trends from dropdown question types (long text and short text) than from free-text question types (Long Text and Short Text).
-
Be a minimalist. Avoid duplication and overcomplicating the form. Simplify where possible and only ask what you need for reporting, trend analysis, investigation or lessons learned.
-
Avoid making questions 'required' if the reporter might not know the information requested at the time of submission, as this can lead to frustration and underreporting.
-
Publish regularly using the blue button on the top right to avoid losing progress. You can use the 'Inactive' status on the Settings page to save your work without making the form live.
Adding sections
Sections are how you group related questions together.
-
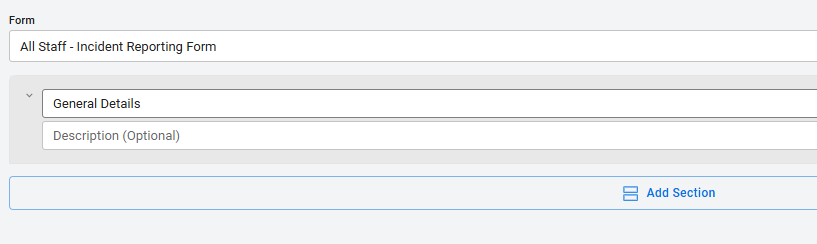
Click Add Section and enter a name e.g. Accident, General Details, Vehicle Details
-
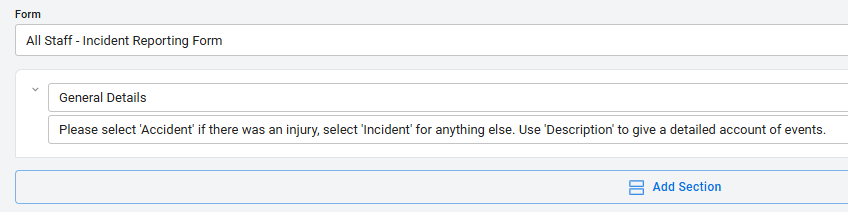
Add an optional description to guide the reporter on definitions of terms or what kind of information they should provide in responses.
Adding questions
Important: Use the form builder to create the reporting form that people will initially use to report an incident. The follow-up and investigation questions will be incorporated in the next step—they should not be added to the form builder.
-
Click Add Question and write your question. Use the dropdown box on the right to select a question type (e.g., Short Text, Dropdown, Date).
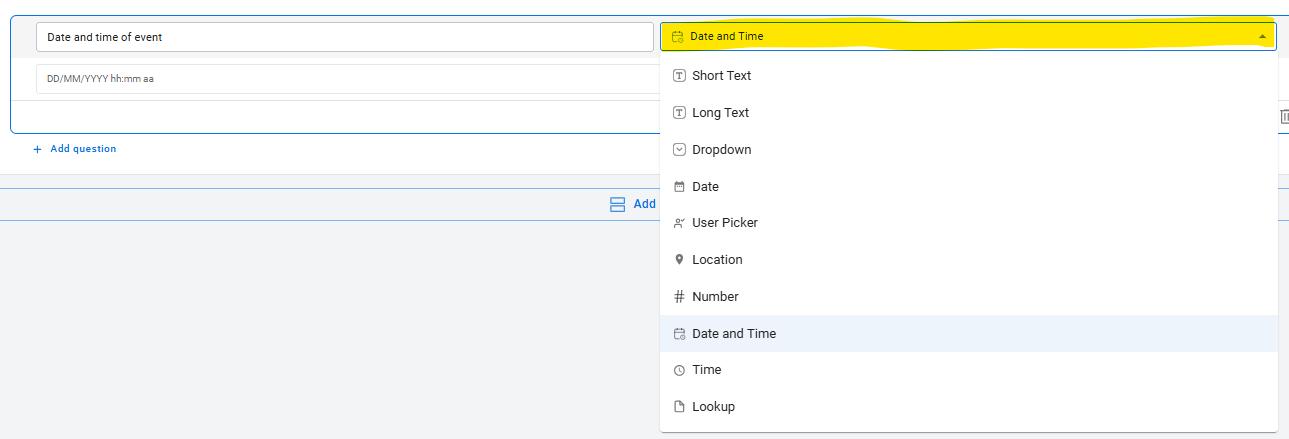
Follow this link for a written description of what the different question types are, or watch the video below for a guide on question types:
-
Configure questions
-
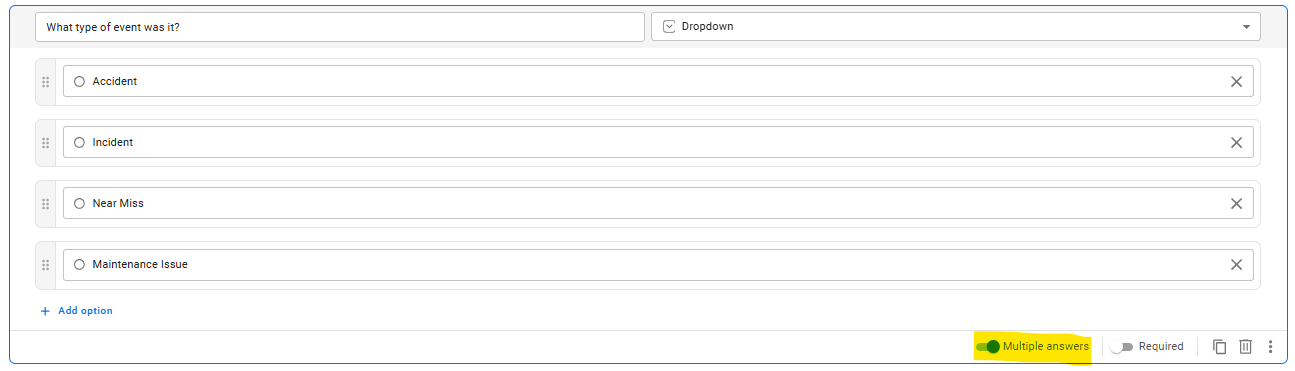
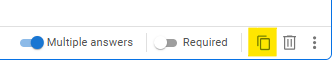
Multiple or single choice? (On Dropdown questions) Enable 'Multiple answers' (blue toggle) for multiple selections or keep it grey for single-choice.
-
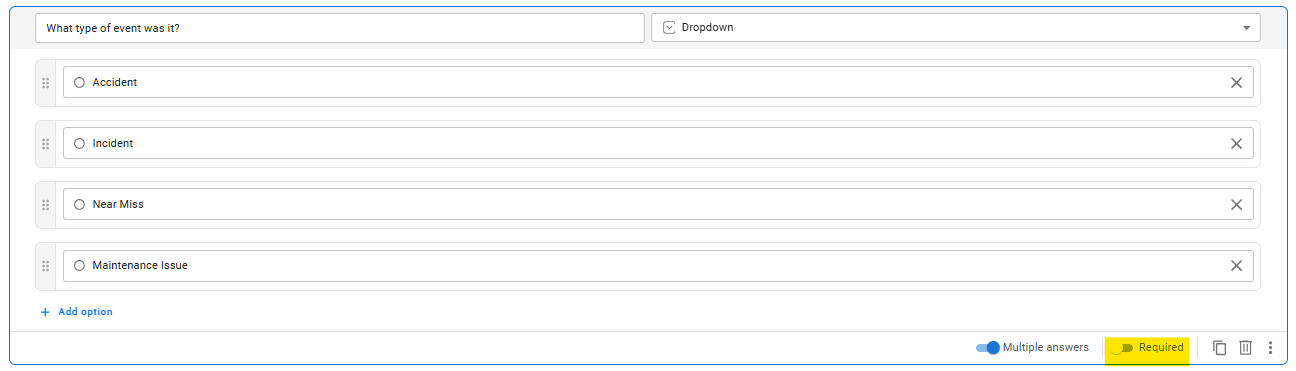
Required or not required? Enable 'Required' (blue toggle) to make a question mandatory. To make a question optional, leave it grey.
-
Duplicate similar questions to save time.
-
Delete a question using the bin icon.

-
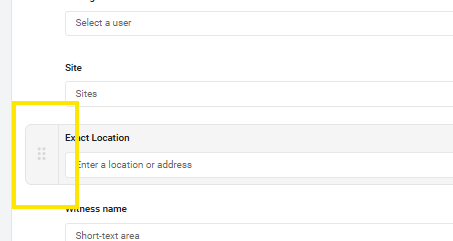
Order: To change the order of the questions, click on the 6 dots on the left of each question and drag and drop to where you want to move it.
-
Tip: Adding all your sections at the start will make it easier to define the form's conditional logic in step 3.
3. Set up conditional logic
Conditional logic (also called branching logic or rule-based logic) can be used to define the path of sections that are shown, and ensures that reporters only see relevant sections based on their responses.
Example
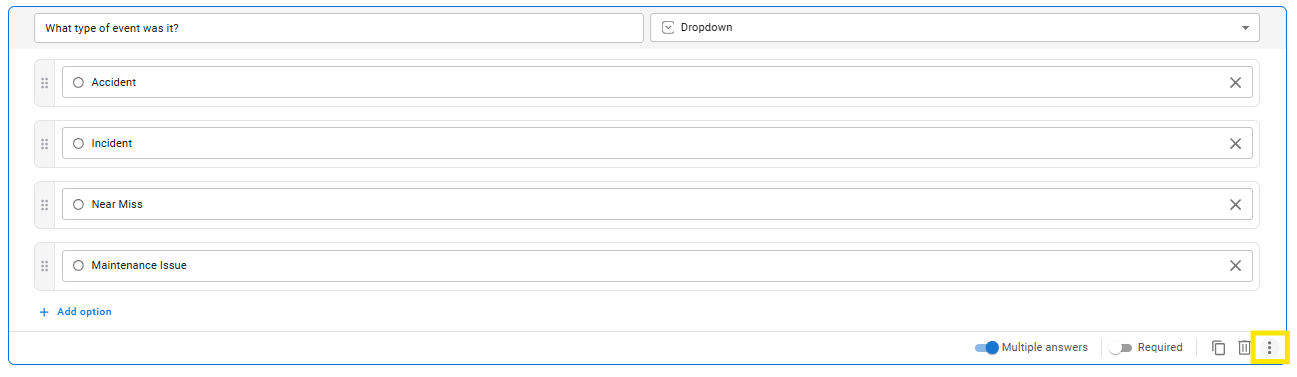
If a user selects Accident under 'Type', an Accident section appears with relevant questions.
'Go to section based on answer' logic (for Dropdown questions)
For questions that have several dropdown options, you can configure the form so that different sections appear in the form based on the dropdown option selected.
-
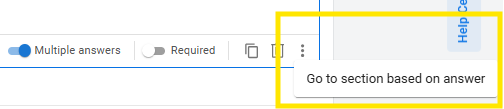
Once you have created your question and the dropdown options, click on the 3 dots and click on 'Go to section based on answer'.
-
Then, for each dropdown option of that question, you will be given the choice between going to a specific section, simply continuing to the next section, or submitting the form.
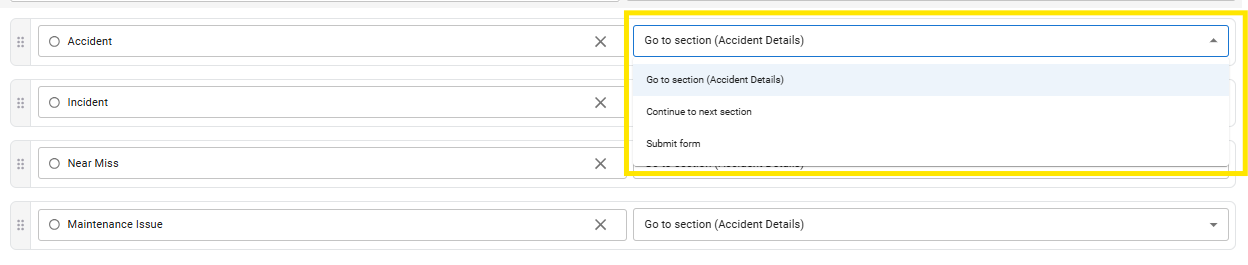
In the example above, I want the responder to be directed to the 'Accident' section if they select 'Accident' in the question about the type of event. I want them to be directed to the 'Near Miss' section if they select 'Near Miss' and to simply continue for the other two options. This is what that will look like:
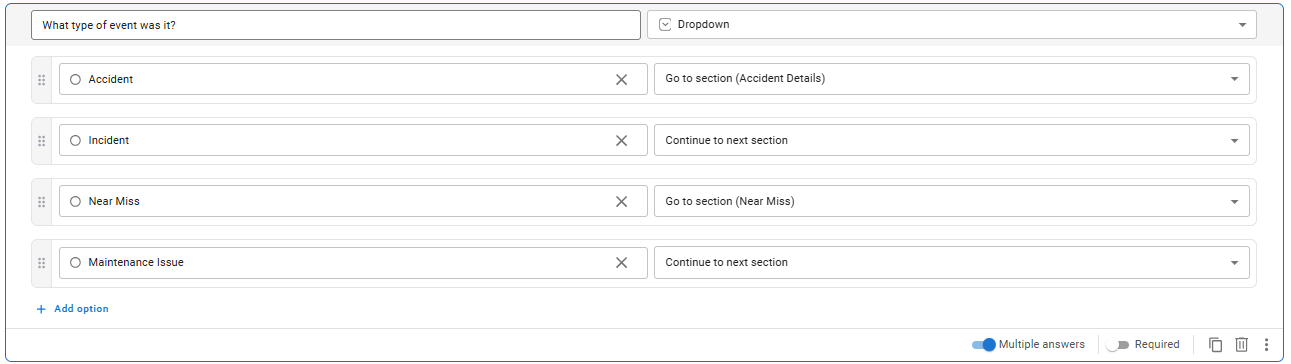
Note: Sections must be created beforehand to appear as options.
'End of the section' logic
At the end of all sections, you will be able to tell the form to either:
-
Go to the next section
-
Go to a specific section, or
-
Submit the form
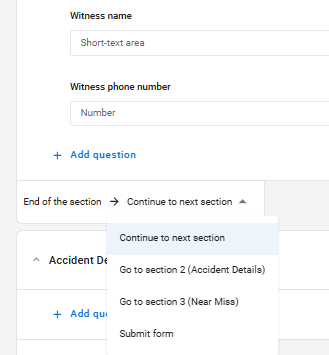
The last section of the form does not offer this option because this is where the form will be submitted.
It is important to set this up so that only relevant sections are shown to the reporter.
For example, in the screenshot below, the reporter will be directed to the Accident section because they have selected 'Accident' in the question 'Type'. Therefore, at the end of the Accident section, I want to ensure that I select 'Continue to section 4' rather than 'Continue to next section' so that the reporter skips the 'Near Miss' section which isn't relevant to them, because they are reporting an Accident, not a Near Miss.
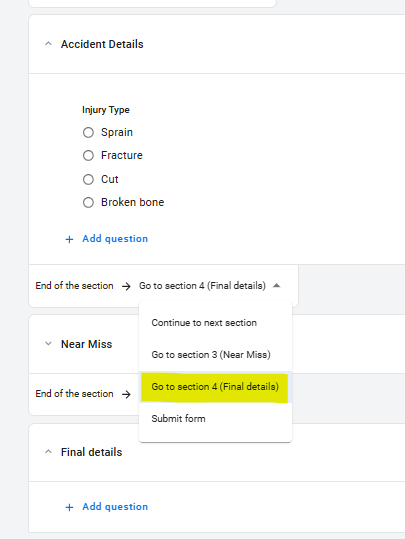
Note: Question-based logic ('Go to section based on answer') takes priority over 'End of section' logic.
4. Configure form settings
Once your form is built, define who can see it and who gets notified with each submission. To do this, click on the 'Settings' tab at the top.

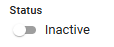
Status
-
'Active' will make this form visible to the audience selected when they go to submit a new event.

-
'Inactive' will hide this form from users.
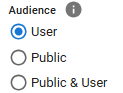
Audience
Would you like this form to be available just to logged in, authenticated users, or also to the public, i.e. non-logged in users, or both? Choose who can submit events using this form:
-
'User' - Logged-in users only. Use this option for internal reporting.
-
'Public' - Non-logged-in users only (e.g. contractors, visitors, members of the public) via a shareable link or QR code.
-
'Public & User' - Both logged-in and non-logged-in users.
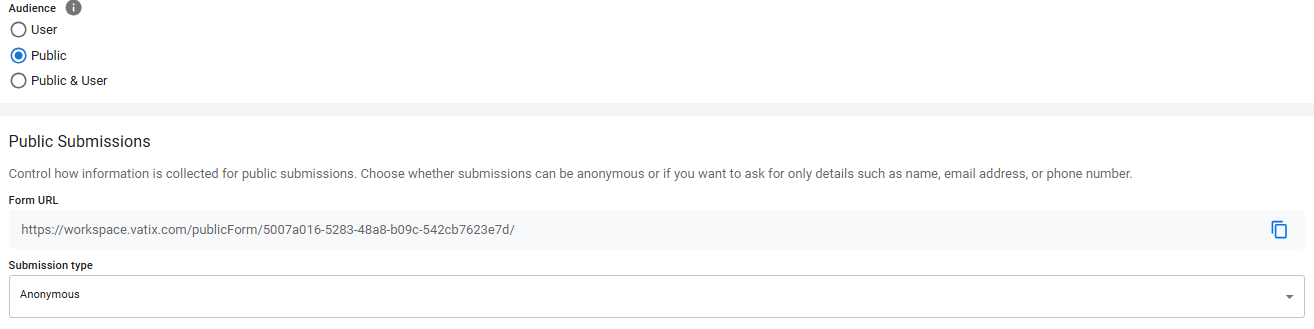
When you select 'Public' or 'Public & User', it will generate a Form URL. This will be the link that you can share with external non-logged-in users will be able to use to report events.

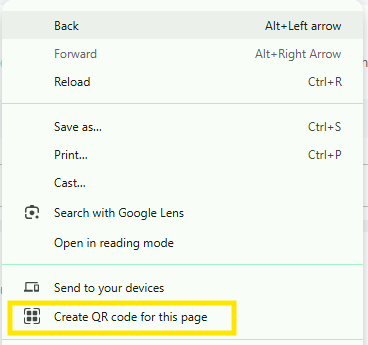
Generating a QR Code
There are many online tools you can use to generate a QR code from the 'Form URL' link. One of the easiest ways if you are using a PC is to right-click on a page and select 'Create QR code for this page' from the menu.
Anonymous or Identified Submissions
Choose whether to keep submissions Anonymous or Ask for user information. If you need to collect the reporter's details, select the toggles to define what information you need them to provide.
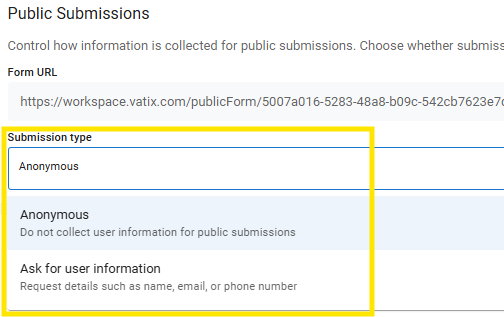
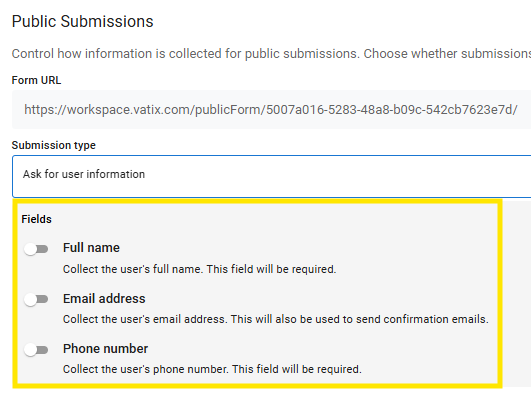
Note: Logged-in users do not need to enter details—the system captures their name and email automatically.
Permissions & Notifications
Who would you like to be notified when a form is submitted?
You can choose to notify and grant access to either managers of the team that the reporter belongs to, specific users, or both.

-
'Notify team managers' - use this option where you have Manager(s) who oversee a particular department/area/location/site, and you need them to be notified and have visibility over event records when a user in their team reports using this form. Ensure that you have Teams set up in order for this to work.
-
'Notify specific users' - use this option where you need particular users to be notified and have visibility of submissions made from this form, regardless of Team structure. This can be particularly useful for Complaints forms, or where people who need to get notified about submissions oversee multiple areas.
5. Test the form and adjust
Before launching, test the form’s flow and logic with a few colleagues. That way, you can make tweaks and changes and anticipate any issues before people start submitting events.
-
Ensure each response leads to the expected sections.
-
Check dropdowns, required fields, and notification settings.
-
Gather feedback and refine as needed.
Next step
Now that your form is built, your next step is to build your Event record view using the Field Manager and Layout editor.